In part 1 I described the general idea and the source for my luminance layering technique for enhancing terrestrial digital photographs. Here in part 2, I will share a more detailed description of the particulars of my process.
I’ve found the luminance layering technique to be useful on images that are a bit flat and could use added contrast, especially where anything but a small adjustment by curves is needed. I’ve found it especially useful on HDR images, which I find can often come out of HDR processing without sufficient contrast. It also can be useful on images where enhanced textures are key or where additional definition of the shapes and forms of objects could be useful. It can also be useful to bring clarity to an image where a limited dynamic range in a photo makes it seem somewhat foggy. The technique requires trial and error to determine if it is appropriate to the image in question. It may not be particularly useful in situations where limited contrast or a softened image is desired.
Before I begin with the luminance layering technique, I’ve already set white balance and done my conversion from RAW format, processed the HDR if appropriate, and adjusted exposure, saturation, color, and so forth. Most of the editing should be complete on the image before attending to seeing if luminance layer adjustments are appropriate, but significant adjustments to contrast should be saved until this point.
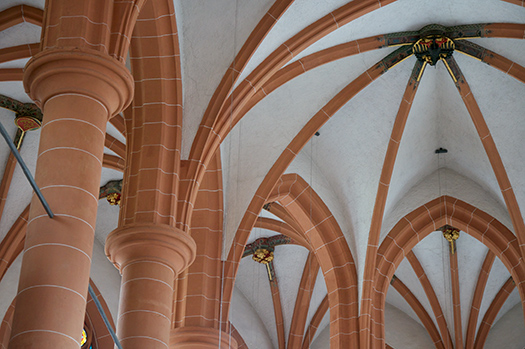
This photo of the ceiling of Heidelberg’s most prominent old city church, the Church of the Holy Spirit, shows the starting point before embarking on the luminance layering technique.

This image could be quite acceptable as it is. But this version is a little flat, with something wanting when it comes to defining the curved shapes in the ceiling. The white vaulting and the stonework arches could perhaps show a little more dimensionality. This is something one would find in a good black and white rendering of this subject, as it only relies on values, not colors, to picture the scene.
Being a good candidate for the luminance layering technique, the next step is to convert this color image to a good black and white image. There are a number of ways to accomplish this with various results. For this technique to be useful, the method of conversion should give a high degree of control over this conversion process, especially over contrast and brightness. My tool of choice is Silver Efex Pro 2 by Nik Software (using Photoshop as a host program). This software is well suited for this technique. Besides creating wonderful black and white images from color digital files with great ease, some of its specific adjustments are very useful here. Besides a fairly straightforward traditional contrast adjustment, the software has a slider called “soft contrast” which applies the effect dynamically to prevent edges from getting too harsh and or having highlights and shadows flattened and losing detail. Further the software contains an adjustment called “structure.” This is a very useful tool which applies a sort of local contrast away from the edges, and thus can enhance the textures of the image. The software gives the user fine control over brightness adjustments, and allows you to introduce film grain and colored filter simulation if desired. I usually don’t add grain or filter adjustments during this process, but it could be useful at times to achieve one’s desired result. Perhaps the most valuable feature here is also the ability to make selective adjustments to areas of the image based on underlying color and contrast data. This would allow the user to select an area where extra contrast is needed, or darken or lighten regions of the image without having to apply complicated layer masks.
Since we are working in black and white, and not directly on the color image, the contrast and structure adjustments can sometimes be pushed a bit further than would look at all satisfactory if similar plug-ins were used to enhance the color image directly. Yet a word of caution, the black and white you create cannot be one that pushes to the extremes. If the resulting black and white image is good to look at, it’s a good chance that the final color image will be good as well. But the changes in the final image may only need to be subtle to bring out the best qualities of the photograph.
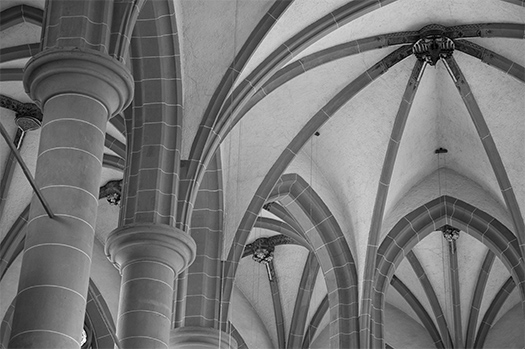
The sliders in Silver Efex Pro are displayed on a percentage basis. Here I have boosted the contrast by a significant amount using the soft contrast slider. A fair amount of structure was added and the overall brightness of the image was increased somewhat, partially to compensate for darkening of parts of the image caused by the increased contrast. There is no science for determining what the settings should be. Always adjust to what looks best for your image and what sort of effect you are after. My black and white conversion is below.

The increased contrast helps to accentuate a the shading in the white vaulted ceilings as well as the convex curve decorating the arch stonework.
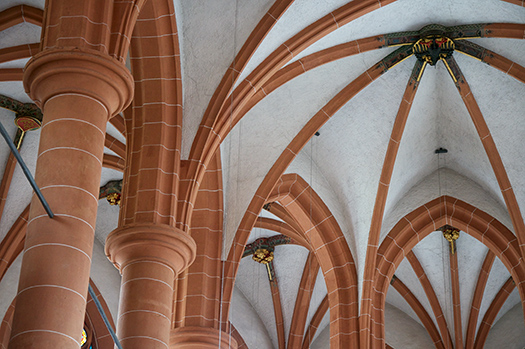
The new layer holding this black and white image is positioned above the adjusted color layer, and the blending mode is changed to luminosity. To this I will often add a very slight s-curve on an adjustment layer to help keep the darks grounded a bit more firmly. The following image, made more pleasing with increased depth and contrast, is the result.

Note, especially, how the shape of the vaulting is now more apparent, being better defined by the shading, and how the image seems cleaner, crisper, and makes use of a fuller dynamic ranger of brightness. For this image, at least, I’ve been unable to obtain a result this satisfactory with curves or other tools for adjusting image contrast.
I invite you to take a look at a number of further examples, with before and after images, which are available here. In addition, a great many of the images in my book of photographs from the small town and cloister of Bad Wimpfen, Germany utilize this technique to add clarity, texture, and contrast. I invite you to take a look.
Larger versions of the images of the Heidelberg church ceiling used in this post are available here.
Leave a Reply